

If you’re wondering how to link application to GCKey, you’re not alone. Many applicants receive their Application Number or Acknowledgement of Receipt (AOR) but aren’t sure how to connect their application to their online IRCC account.
Linking your application allows you to check your application status, receive messages from IRCC, and manage your file online. However, many people encounter errors such as “No application found” because of incorrect information or selecting the wrong application category.
In this guide, we’ll walk you through the entire process using screenshots, explain the information you’ll need, and highlight common mistakes to avoid.
Prefer a video walkthrough? Watch the video on our YouTube channel
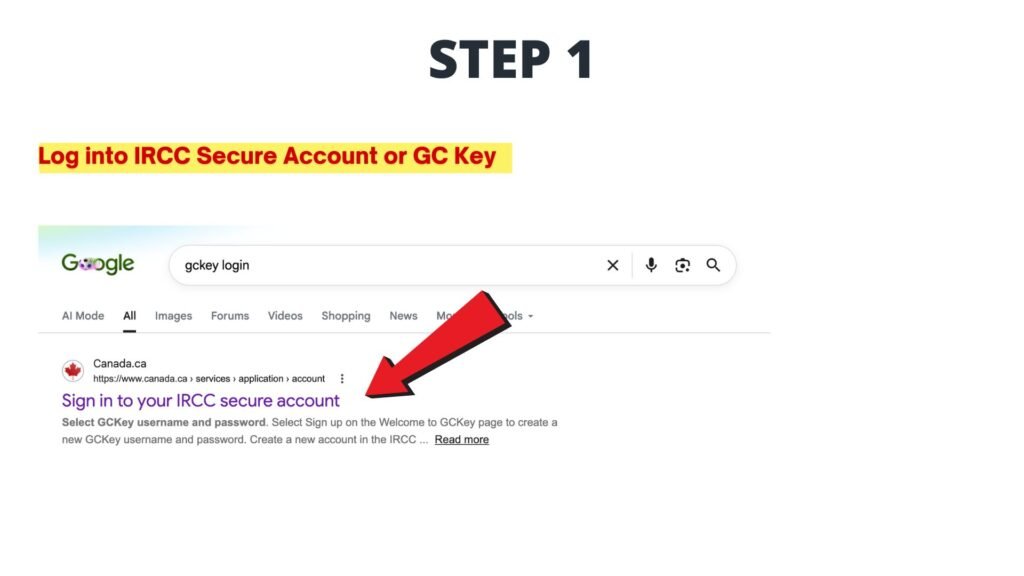
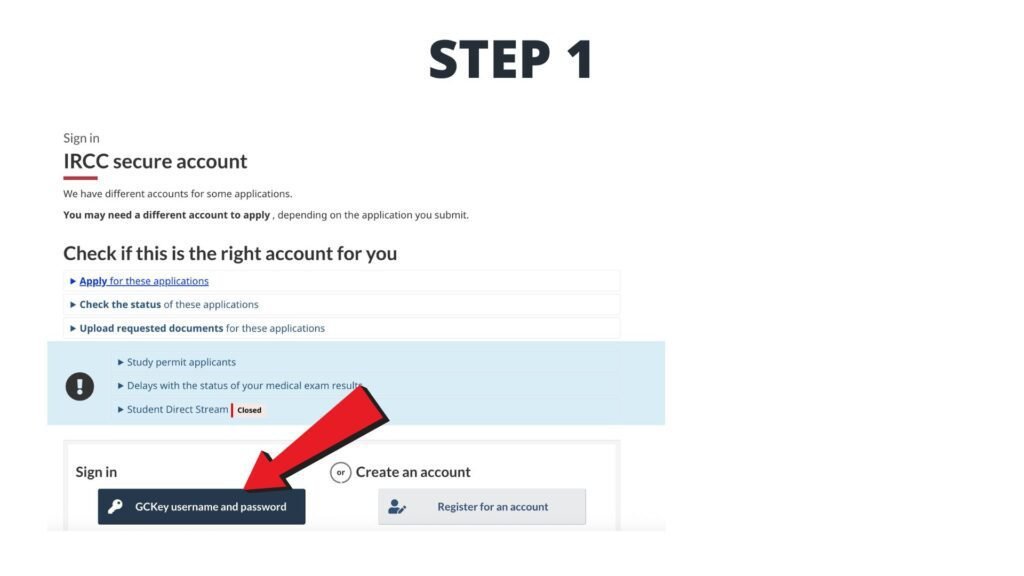
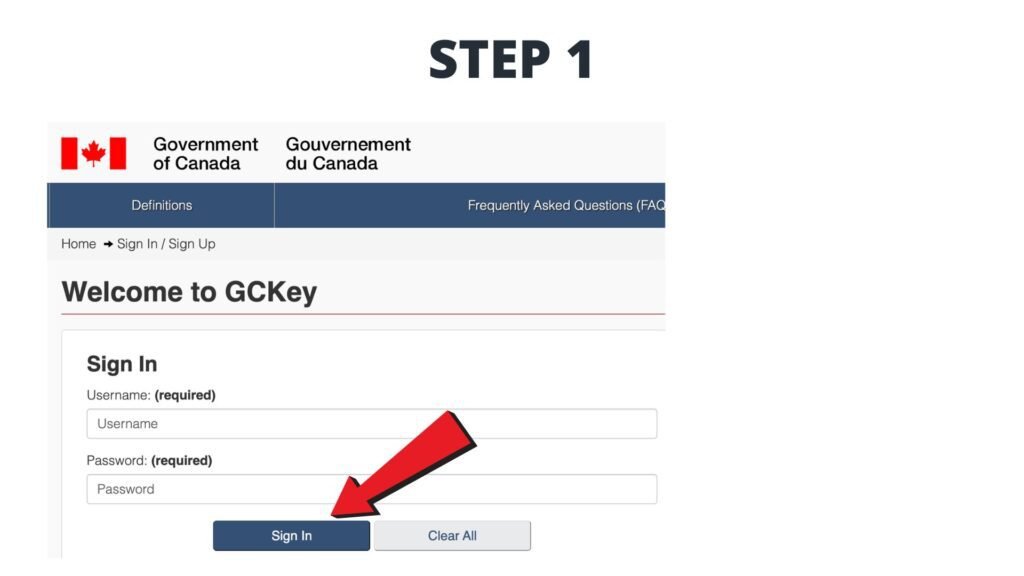
Step 1: Sign in to Your GCKey Account
Visit the IRCC Secure Account page and sign in using your GCKey username and password.
If you don’t already have a GCKey account, you’ll need to create one before continuing.
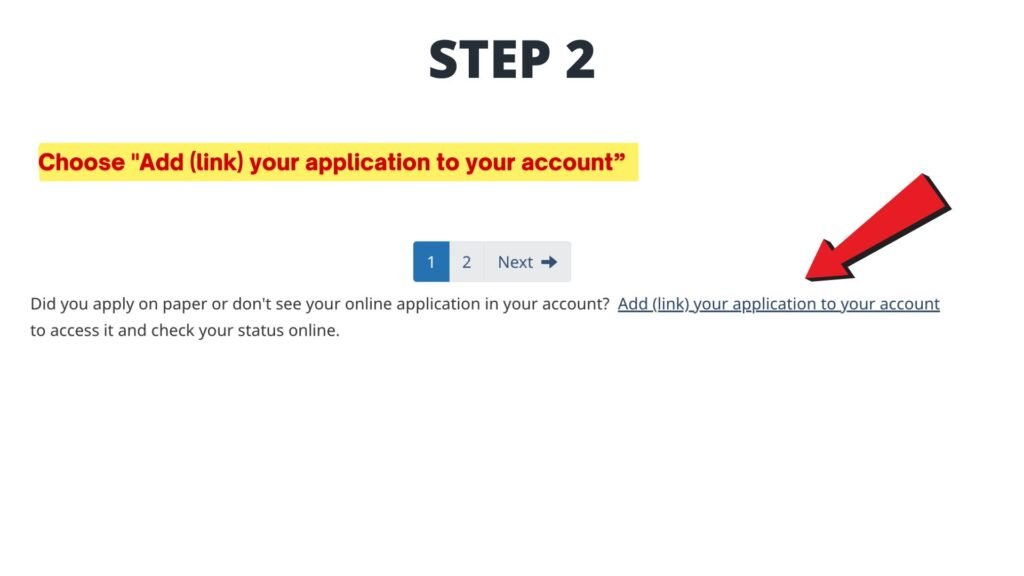
Step 2: Select “Add (Link) Your Application”
After signing in, scroll to the section where you can add an existing application to your account.
Click:
Add (link) your application to your account
This option allows you to connect an application that was submitted separately.
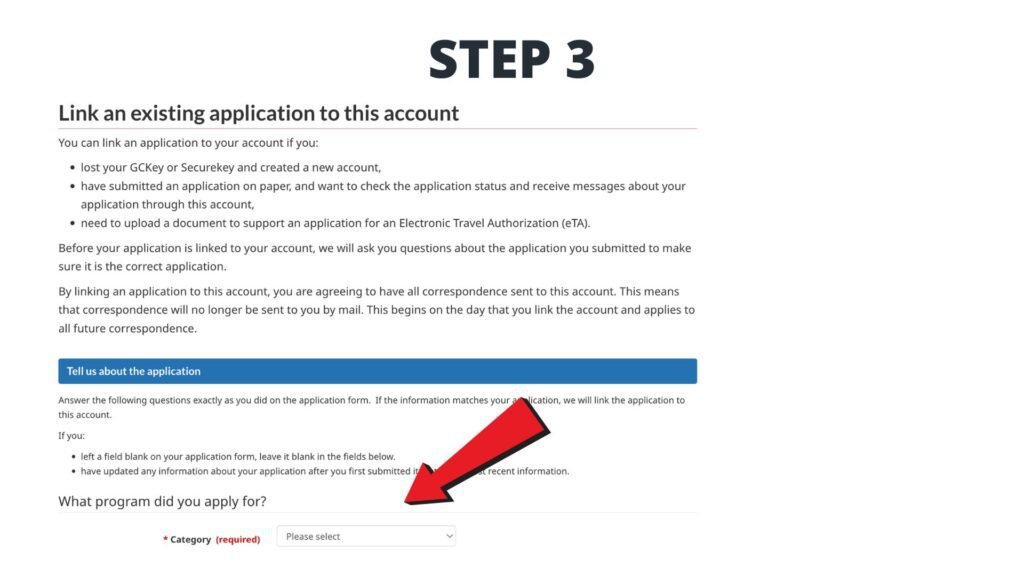
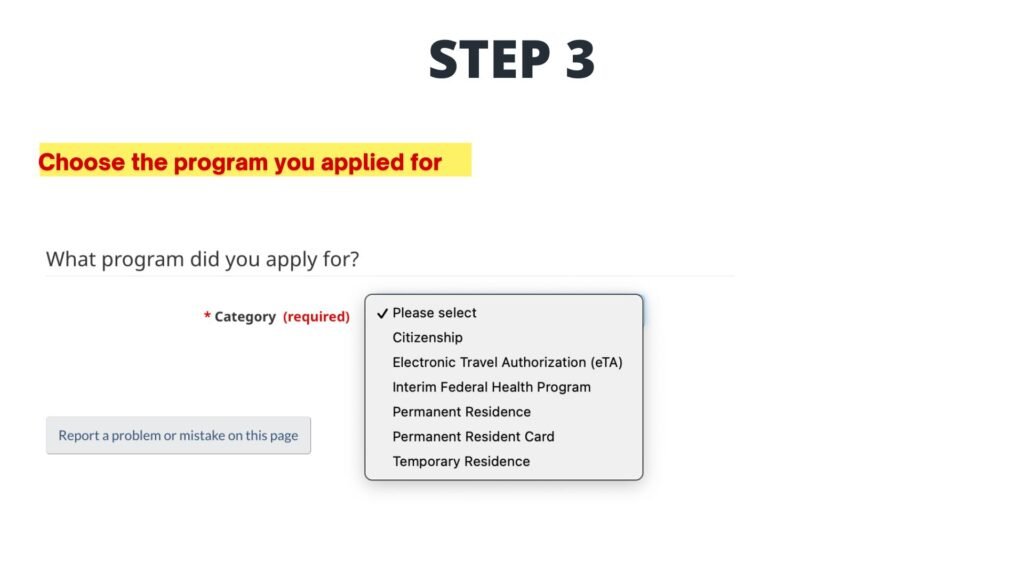
Step 3: Choose the Correct Application Category
Select the correct:
- Category
- Sub-category
- Application type
For example:
- Permanent Residence
- Temporary Residence
- Permanent Resident Card
- Citizenship
Choosing the wrong category is one of the most common reasons an application cannot be found.
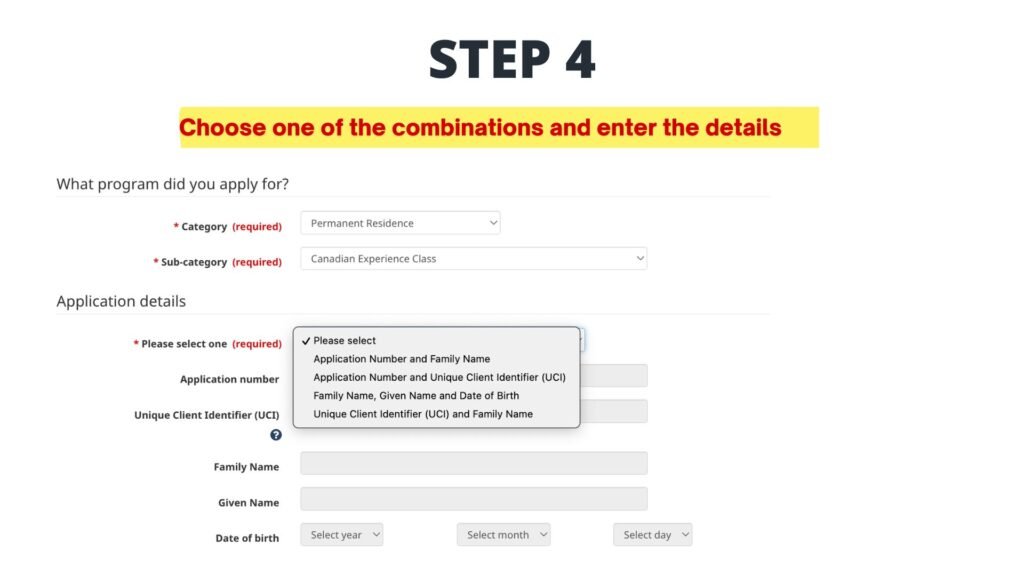
Step 4: Enter Your Application Details
You’ll be asked to choose one of several identification methods, such as:
- Application Number and Family Name
- Application Number and UCI
- UCI and Family Name
- Family Name, Given Name and Date of Birth
Choose the option you have available and enter the information exactly as shown on your application.
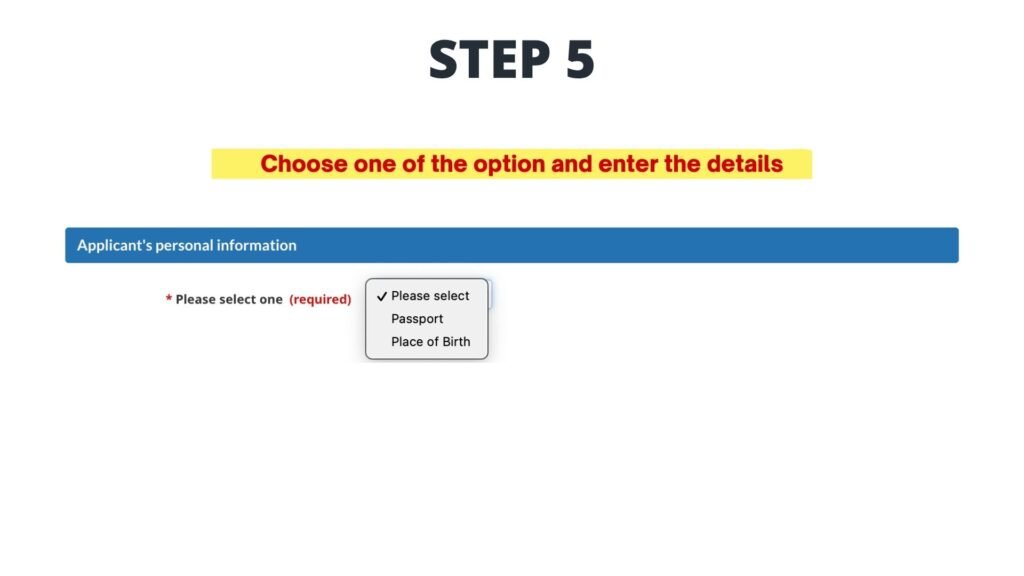
Step 5: Enter Your Personal Information
Next, you’ll provide additional information to help IRCC locate your application.
Depending on your chosen option, you may be asked for:
- Passport information
- Place of Birth
Again, the information must exactly match what was submitted.
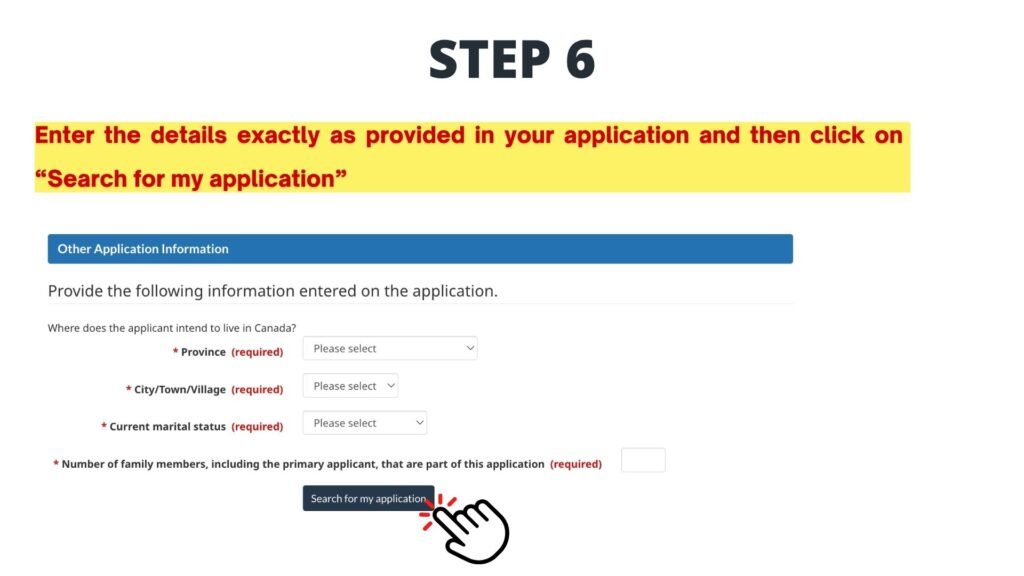
Step 6: Complete the Remaining Details
Enter any remaining information requested, including:
- Province
- Intended city
- Marital status
- Number of family members included in the application
Finally, click:
Search for my application
If the information matches IRCC’s records, your application will be linked successfully.
Important Tips Before You Try Again
Keep these points in mind:
✅ Enter the information exactly as it appears on your application.
✅ If you receive “No application found,” double-check every detail before trying again.
✅ After five unsuccessful attempts, IRCC temporarily prevents additional linking attempts for 24 hours.
Sometimes, if you’ve only recently received your Application Number or AOR, it may take a little longer before the application becomes available for linking.
Need Help with Your Canadian Immigration Applications?
Book a consultation today to receive personalized guidance on your Canadian immigration applications.